Before I decided to run a Linux based, headless installation of VirtualBox, I had been running all my virtual machines in VMware Workstation. When it was time to switch I exported a number of virtual machines that I had already built to OVF format. These were servers like Windows with Active Directory, GIT, Ansible, that I didn’t want to go through the hassle of building again from scratch. This post is dedicated to my experience of doing this and some of the post migration work that needs to be performed, such as removing VMware Tools, etc.
Page Contents
Import Existing Virtual Machine Image
Before you get started
One tip before you start. When you import the VM into VirtualBox, it’s possible that the network adaptor information will change. This was definitely the case for me when I migrated from Workstation that used the VMXNET3 driver. My interface was configured as ‘ens33‘ and when I switched to the virtio driver in VirtualBox the device came up as eth0. I was therefore unable to connect to my headless VM. My solution was to fire up the source VM again and copy the ‘ifcfg-ens33‘ in /etc/sysconfig/network-scripts/ to ‘ifcfg-eth0‘ and change any references from ens33 to eth0. Finally, I commented out the UUID line. When I re-imported, I was able to connect the my VM.
Import Virtual Machine
To perform the import I am going to use the VBoxManage import command. This command allows the –dry-run flag to be supplied and will provide details of how the virtual machine will look once it has been imported into VirtualBox. This is useful as it allows us to ensure that the configuration is how we want it to be. The dry run will also provide any optional flags that can be used to influence the import. There are also the global options keepallmacs, keepnatmacs, and importtovdi.
I have some virtual machines that have been exported to OVF format:
# ls *.ovf

SG1-ADC001.ovf  SG1-ANS001.ovf  SG1-GIT001.ovf  SG1-PFW001.ovf
So let’s take a look at my Ansible (SG1-ANS001) virtual machine that is running on CentOS 7.x.
# VBoxManage import SG1-ANS001.ovf --dry-run

0%...10%...20%...30%...40%...50%...60%...70%...80%...90%...100%
Interpreting /mnt/vm2/ovf/vm/SG1-ANS001.ovf...
OK.
Disks:
  vmdisk1       20      2290810880      http://www.vmware.com/interfaces/specifications/vmdk.html#streamOptimized       SG1-ANS001-disk1.vmdk   896100352       -1

Virtual system 0:
 0: Suggested OS type: "RedHat_64"
    (change with "--vsys 0 --ostype <type>"; use "list ostypes" to list all possible values)
 1: Suggested VM name "vm"
    (change with "--vsys 0 --vmname <name>")
 2: Number of CPUs: 1
    (change with "--vsys 0 --cpus <n>")
 3: Guest memory: 2048 MB
    (change with "--vsys 0 --memory <MB>")
 4: USB controller
    (disable with "--vsys 0 --unit 4 --ignore")
 5: Network adapter: orig custom, config 5, extra type=Bridged
 6: CD-ROM
    (disable with "--vsys 0 --unit 6 --ignore")
 7: SCSI controller, type LsiLogic
    (change with "--vsys 0 --unit 7 --scsitype {BusLogic|LsiLogic}";
    disable with "--vsys 0 --unit 7 --ignore")
 8: IDE controller, type PIIX4
    (disable with "--vsys 0 --unit 8 --ignore")
 9: Hard disk image: source image=SG1-ANS001-disk1.vmdk, target path=/mnt/vm2/vbox/vm/vm/SG1-ANS001-disk1.vmdk, controller=7;channel=0
    (change target path with "--vsys 0 --unit 9 --disk path";
    disable with "--vsys 0 --unit 9 --ignore")
The dry run feature represents the virtual machine image as a Virtual system followed by an index. As this image only contains a single virtual machine, only index 0 is present. The VM hardware configuration is listed as units. Therefore, I can go through each unit in turn and ensure that the target machine is configured correctly. From the dry run output there are a number of units that need to be modified. I will build out the command as I go along.
1: Suggested VM name “vm” (change with “–vsys 0 –vmname <name>”)
This will need to be changed to the actual name of the VM, which in this case is SG1-ANS001. I can use the options –vsys 0 –vmname <name> to accomplish this.
# VBoxManage import SG1-ANS001.ovf --vsys 0 --vmname "SG1-ANS001"
5: Network adapter: orig custom, config 5, extra type=Bridged
The original VM was using a custom host-only network interface on the previous hypervisor which is not understood by VirtualBox. The import command is therefore defaulting to a suggestion of a Bridged interface, which is not correct. I need connect the virtual network card to my vboxnet0 host-only interface on VirtualBox. Unfortunately, the import command does not provide an option that I can see which can make this change. I will therefore need to modify the VM once it has been imported.
9: Hard disk image: source image=SG1-ANS001-disk1.vmdk, target path=/mnt/vm2/vbox/vm/vm/SG1-ANS001-disk1.vmdk, controller=7;channel=0
The source disk image is a VMDK, the format used by VMware. Although VirtualBox uses the VDI disk image format, it has defaulted to continue using VMDK. This will still work but as my goal is to move to a fully Open Source solution, converting to VDI makes more sense. The global option importtovdi can be used to achieve this. My command now looks like:
# VBoxManage import SG1-ANS001.ovf --options importtovdi --vsys 0 --vmname "SG1-ANS001"
VirtualBox will default to re-initialising the MAC address of all network cards on the VM. I am not interesting in making post configuration changes because of this and my preference would be to preserve the existing MAC addresses that was allocated to the original VM. There is no real reason not to do this. The global option keepallmacs can be used to achieve this. My final command now looks like this:
# VBoxManage import SG1-ANS001.ovf --options keepallmacs,importtovdi --vsys 0 --vmname "SG1-ANS001"
If we issue another –dry-run against the new command we can see most of the changes have taken effect.
# VBoxManage import SG1-ANS001.ovf --options keepallmacs,importtovdi --vsys 0 --vmname "SG1-ANS001" --dry-run

0%...10%...20%...30%...40%...50%...60%...70%...80%...90%...100%
Interpreting /mnt/vm2/ovf/vm/SG1-ANS001.ovf...
OK.
Disks:
  vmdisk1       20      2290810880      http://www.vmware.com/interfaces/specifications/vmdk.html#streamOptimized       SG1-ANS001-disk1.vmdk   896100352       -1

Virtual system 0:
 0: Suggested OS type: "RedHat_64"
    (change with "--vsys 0 --ostype <type>"; use "list ostypes" to list all possible values)
 1: VM name specified with --vmname: "SG1-ANS001"
 2: Number of CPUs: 1
    (change with "--vsys 0 --cpus <n>")
 3: Guest memory: 2048 MB
    (change with "--vsys 0 --memory <MB>")
 4: USB controller
    (disable with "--vsys 0 --unit 4 --ignore")
 5: Network adapter: orig custom, config 5, extra type=Bridged
 6: CD-ROM
    (disable with "--vsys 0 --unit 6 --ignore")
 7: SCSI controller, type LsiLogic
    (change with "--vsys 0 --unit 7 --scsitype {BusLogic|LsiLogic}";
    disable with "--vsys 0 --unit 7 --ignore")
 8: IDE controller, type PIIX4
    (disable with "--vsys 0 --unit 8 --ignore")
 9: Hard disk image: source image=SG1-ANS001-disk1.vmdk, target path=/mnt/vm2/vbox/vm/vm/SG1-ANS001-disk1.vdi, controller=7;channel=0
    (change target path with "--vsys 0 --unit 9 --disk path";
    disable with "--vsys 0 --unit 9 --ignore")
We can now re-issue the command with the –dry-run omitted to perform the import of this virtual machine into VirtualBox. The progress will be displayed and a message if the import was successful:
![]()
Post-Import Configuration
Let’s check that we can see the VM in the VirtualBox inventory:
# VBoxManage list vms

"SG1-ANS001" {bb8bf5ab-d33b-4e3d-a3c6-19cd620d4a80}
Configure Networking
If you recall from the previous section, we were not able to change the network card binding during the import. We can do this now that the VM has been imported using the VBoxManage modifyvm command. I need to bind to a host-only interface called vboxnet0.
# VBoxManage modifyvm SG1-ANS001 --nic1 hostonly --hostonlyadapter1 vboxnet0
I also want to use the paravirtualized Network Adaptor using the virtio driver for better performance.
# VBoxManage modifyvm SG1-ANS001 --nictype1 virtio
The VBoxManage showvminfo command can be used to view the VMs configuration, which can be used to confirm any changes that have been made.
# VBoxManage showvminfo SG1-ANS001
...
NIC 1:           MAC: 0800279E9F01, Attachment: Host-only Interface 'vboxnet0', Cable connected: on, Trace: off (file: none), Type: 82545EM, Reported speed: 0 Mbps, Boot priority: 0, Promisc Policy: deny, Bandwidth group: none
NIC 2:           disabled
NIC 3:           disabled
NIC 4:           disabled
...
Disable Audio
I noticed from my VBoxManage showvminfo output that an Audio card was enabled.
Audio: enabled (Driver: ALSA, Controller: AC97, Codec: STAC9700)
I do not require this so the card can be disabled:
# VBoxManage modifyvm SG1-ANS001 --audio none
Set VM Description
While we’re at it, it would probably be a good idea to give this VM a small description.
# VBoxManage modifyvm SG1-ANS001 --description "Ansible Server"
Virtual Machine Power Operations
Start VM
Since we’re going to be running this VM in headless mode, the alternative binary VBoxHeadless will be used instead of VBoxManage. The VBoxHeadless interface accepts the same start parameters. If you see the copyright information after you have run the command then the VM will have been started successfully.
# VBoxHeadless --startvm SG1-ANS001

Oracle VM VirtualBox Headless Interface 5.2.0
(C) 2008-2017 Oracle Corporation
All rights reserved.
Use the VBoxManage list runningvms command to verify that the VM process is actually running.
# VBoxManage list runningvms

"SG1-ANS001" {b4cf5620-f029-408f-af53-2eac520a9d55}
Stop VM
You can gracefully stop the running VM using the VBoxManage controlvm <vm> acpipowerbutton command.
# VBoxManage controlvm SG1-ANS001 acpipowerbutton
Troubleshooting
If you aren’t able to connect to the VM after it has been started then it may have failed to boot or a network configuration issue. As the VMs are running in headless mode it can be difficult to diagnose. There are a couple of decent ways to help diagnose the issue.
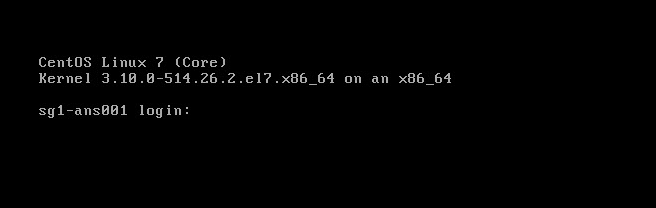
Screenshot
This option is simple and takes a screenshot of the console. You can specify the filename to save (in PNG format) then download this via SCP from the VirtualBox host.
# VBoxManage controlvm "SG1-ANS001" screenshotpng screen.png
Serial Port (console redirect)
I will follow up with an additional post on how the display output can be redirected to the serial port and some cool ways that we can view and interact with this session.
If there is some other configuration that I could apply to my VMs or vbox installation, then please let me know.