- IaC for vRealize: Deploying vRealize Build Tools To Allow Infrastructure As Code for vRA and vRO
- IaC for vRealize: Manage Existing vRO Code With vRealize Build Tools & Set up Git Repositories
- IaC for vRealize: Define Dependencies, Manage Versions, Prepare & Release Packages & Deploy Artifacts
- IaC for vRealize: Documenting Code with JSDoc and Syntax Checking and Code Style Management with ESLint
- IaC for vRealize: Updating Archetypes and Adding Boilerplate For Your vRO Actions
Welcome to the third part in the series working with the vRealize Build Tools. At this stage, you should have a fully working CI infrastructure and have all of your vRO code exported using packages and stored in Git repositories. In this post, I will show you how to manage dependencies across your packages and how you can use the Maven plugins to automatically update packages so that they are using the latest dependency versions.
I will also show you how to manage versioning for development (Snapshots) and production (release) code. Once we have our versioning in place, I will detail how to prepare the releases and finally push the artefacts to the Artifactory repositories, which can be picked up by a release pipeline (something I will cover in much more detail in a later post).
I also want to point out that I had to update my previous post to include the git scm connections in your pom.xml files, as this is required for this post, so make sure to go back and check that out.
Page Contents
Understanding Snapshot vs Release Versions
The first thing to understand is the ‘-SNAPSHOT‘ string that is suffixed to package versions. You will have noticed that all of the package versions you created in my previous post, were version ‘1.0.0-SNAPSHOT’. This suffix tells Maven that the code inside this package is in a development stage and not suitable for production release. The Maven release plugins understand this and will prevent the dependency handler from including these as valid dependencies for your packages, as this could result in unstable code (though, they can be defined manually).
If you are following these posts, then currently, all your packages will be at version 1.0.0-SNAPSHOT. Don’t worry, we will change this later, but for now, accept this as-is.
Define Dependencies
In my previous post, I provided an example of 3 packages that I have created. I also created a table that detailed the ‘groupId‘ and ‘artifactId‘ for these packages. I am going to extend this table to list their dependencies on other packages. I have kept this simple, in that no dependencies exist outside of these 3 packages.
A dependency exists when one package is calling code from another package (typically with a System.getModule()). When dependencies are mapped, their artefacts and required versions are released as part of the release process.
| groupId | artifactId | Dependency |
| com.simplygeek.library | logger | |
| com.simplygeek.library | rest | logger |
| com.simplygeek.library | nsx | logger rest |
I have added the ‘Dependency‘ column, which lists the projects/artefacts that this package depends on. All of my packages depend on ‘logger‘, whereas ‘nsx‘ also depends on ‘rest‘.
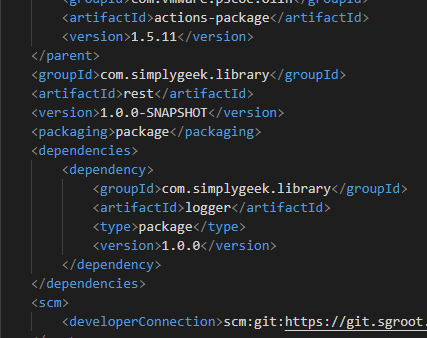
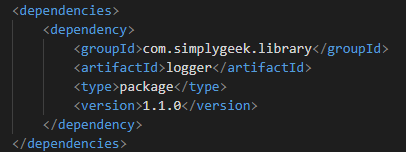
We now need to add some XML to the projects ‘pom.xml‘ file, that is located at the root of the project folder. These are ‘<dependencies>‘ tags that are used to define a set of ‘<dependency>‘ tags for the project. You should insert these tags immediately after the ‘<packaging>‘ tags but before the ‘<scm>‘ tags.
We also want to omit ‘-SNAPSHOT‘ from the version, since we’ll be pushing actual releases.
Below is an example of what the dependency XML insert looks like for the ‘rest‘ package:
<dependencies>
    <dependency>
        <groupId>com.simplygeek.library</groupId>
        <artifactId>logger</artifactId>
        <type>package</type>
        <version>1.0.0</version>
    </dependency>
</dependencies>
Once you have completed defining your dependencies, save the ‘pom.xml‘ file and make sure to commit the changes to git.
Repeat this process for all of your projects.
Prepare & Release Packages
Maven provides several lifecycle phases and goals that can be used to prepare and perform the releases. We will also need to push the release artefacts to the Artifactory repositories, as this will be queried for dependencies when releasing a package that has any defined.
You should first be focusing on all the core projects that make up most of your dependencies. Also, start with the projects that have dependencies in the lowest order, i.e. the ‘logger‘ project has no dependencies, so that will be released first, ‘rest‘ depends on ‘logger‘, so that will be released next, etc.
For all the release tasks, we’re going to specify the ‘release‘ plugin followed by the goal. We will use the following goals:
- Clean
- Prepare
- Perform
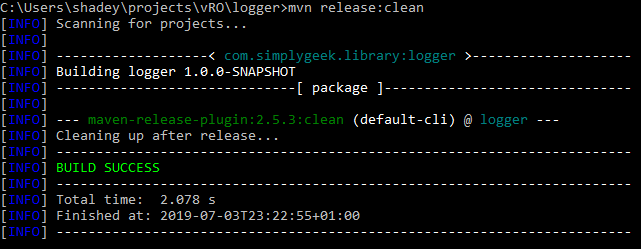
release:clean
The clean goal will remove any build or temporary files that were leftover from a previous release. It’s generally a good idea to always run this goal first. Perform the clean goal using the following command:
mvn release:clean
Not much to see here other than a successful confirmation:
release:prepare
The prepare goal will run through several phases to ensure everything is ready for a release. The following release phases are used:
- Check that there are no uncommitted changes in the sources
- Check that there are no SNAPSHOT dependencies
- Change the version in the POMs from x-SNAPSHOT to a new version (you will be prompted for the versions to use)
- Transform the SCM information in the POM to include the final destination of the tag
- Run the project tests against the modified POMs to confirm everything is in working order
- Commit the modified POMs
- Tag the code in the SCM with a version name (this will be prompted for)
- Bump the version in the POMs to a new value y-SNAPSHOT (these values will also be prompted for)
- Commit the modified POMs
This was taken exactly as-is from the official Maven documentation.
To prepare the release, use the following command:
mvn release:prepare
You will be presented with 3 questions about the release:
- What is the release version for ‘project’?
- What is the SCM release tag or label for ‘project’?
- What is the new development version for ‘project’?

The prepare goal is going to update Git with the release version and add the specified tag. It will also update the ‘pom.xml‘ file for the current working folder with the next snapshot release.
You can also run this in non-interactive mode by specifying ‘–batch-mode‘ or ‘-B‘ before the goal, which will apply the default values, i.e.
mvn --batch-mode release:prepare
One thing to note is that Maven uses the following version timeline when incrementing versions:
1.0.0-SNAPSHOT
1.0.0
1.0.1-SNAPSHOT
1.0.1
1.0.2-SNAPSHOT
1.0.2 ...
You can override the default values and specify your tag and versions using three additional system properties, ‘tag‘, ‘releaseVersion‘ and ‘developmentVersion‘:
mvn -B release:prepare -Dtag=v1.0.0 -DreleaseVersion=1.0.0 -DdevelopmentVersion=1.1.0-SNAPSHOT
Note, that you only need to specify a property, if it provides a different value than the default, otherwise it can be omitted (i.e. you can specify just the developmentVersion property).
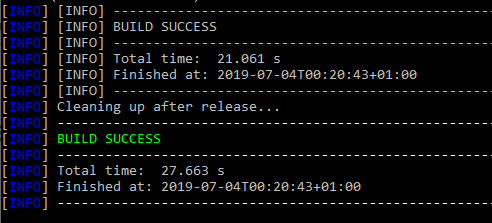
After the command has completed you will see a build success:
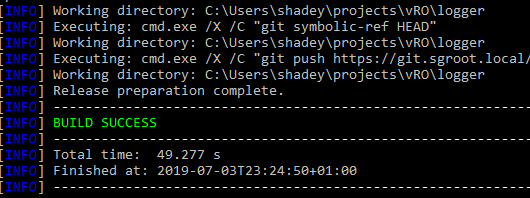
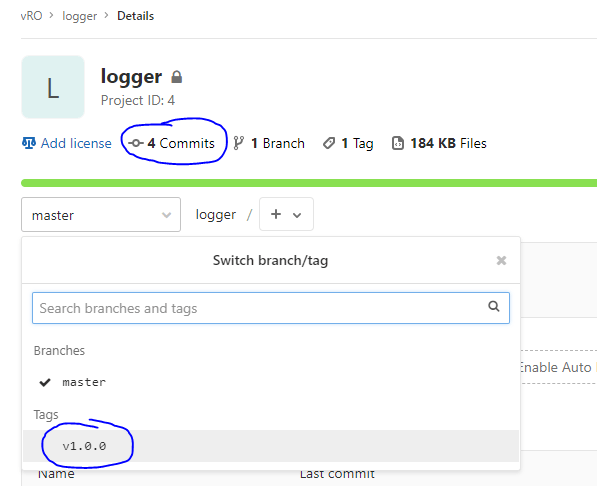
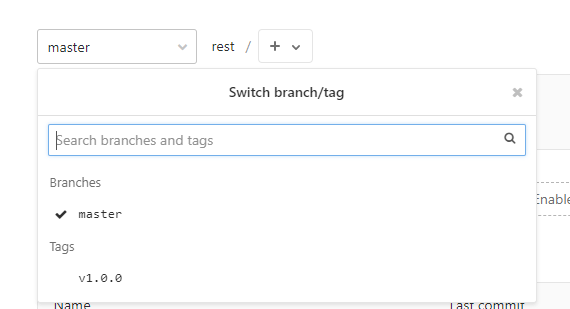
Also, if you look at the Git repository, you will see that there are some new commits and that a tag has been added.
You will also notice that the version has been increased in the ‘pom.xml‘ file to the next development version snapshot:

release:perform
The final stage of the release process is to run the ‘perform‘ goal. This will perform the following steps:
- Checkout project from SCM;
- Deploy artefacts to a remote repository (Artifactory);
To perform the release, use the following command:
mvn release:perform
You will see several upload tasks being performed to Artifactory and finally confirmed that the build was successful.
You can also run all of the Maven goals as a single command:
mvn -B release:clean release:prepare release:perform
or
mvn -B release:clean release:prepare release:perform -Dtag=v1.0.0 -DreleaseVersion=1.0.0 -DdevelopmentVersion=1.1.0-SNAPSHOT
However, I recommend that you run release:clean on its own, to prevent accidentally running this command when you want to resume from a previous failure.
The Git repository will now be updated and the tag applied for the release version (1.0.0, without -SNAPSHOT). The current branch will now be set to the next SNAPSHOT release.
The only task left, is to deploy the code to the vRO server(s).
Deploy Package to vRO
Now that you have run through the Maven release process and have your Git repositories updated, it’s time to push the code to your vRO server(s). For this, we’ll use the vrealize:push goal that is provided by the vRealize Build Tools.
You have a choice to make here as there is the 1.0.0 release (tagged) and (in my case) the 1.0.1-SNAPSHOT, which is the next development release. Since vRO is only capable of allowing one active version of the code, you may decide to push the release version.
As the development of the next version continues (and remains a SNAPSHOT), you may want to, at times, push this code to the vRO server for testing as you develop. Of course, this could then make other code unstable (which is expected in a development environment, but it’s lack of branching capability means the code is always at a MASTER branch scope).
I plan to discuss branching techniques and complex vRO environments in a later post, but for now, I will just cover how to push both the release and snapshot versions to your vRO server.
Push Release Version
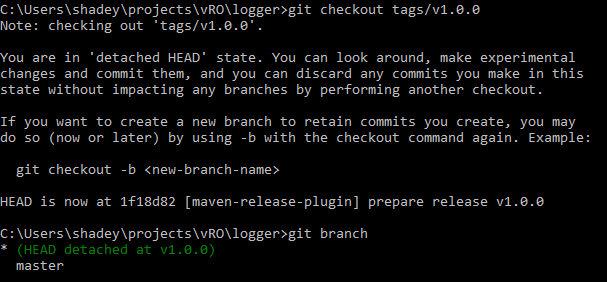
The release version (1.0.0 in this example) is set as a tag in Git. This tag is currently on the upstream repository and we need to update our local repository to include all the latest tags. We can do this by running the following Git command:
git fetch --all --tags --prune
You can then list all available tags:
git tag --list

And we can see the v1.0.0 tag is visible.
Next, we need to check out the tagged version using the following command:
git checkout tags/v1.0.0
You will get a notice that you are in a ‘Detached HEAD’ state. This just means that the tag you are checking out only exists on the upstream repository and is in a read-only state locally. Since we’re not going to be modifying this version of the code, it’s fine for what we need. If you did want to edit a tagged branch, then the notice provides instructions.
You can confirm that the tagged branch has been checked out by running the ‘git branch’ command:
git branch
Finally, we push the release to the vRO server:
mvn package vrealize:push -Pdevelopment
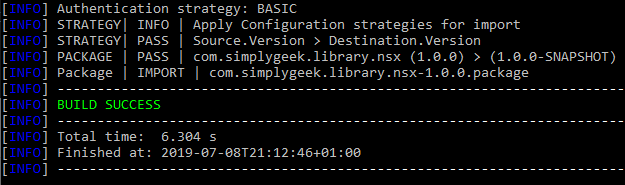
And we can see that the packages have been imported to the vRO server.
Push Snapshot Version
Pushing the snapshot version is very simple. You are pushing the current branch, which includes the current snapshot release, Therefore, you can jump straight to pushing the code to the vRO server:
mvn package vrealize:push -Pdevelopment
And we can see that the packages have been imported to the vRO server.
Update Projects when Dependency Versions Change
As the code is developed and versions change, it can be difficult to make sure that your projects are using the latest version of a dependency. Fortunately, Maven provides a plugin that can be used to detect if dependencies have updated and update the ‘pom.xml‘ files for your project.
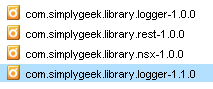
In this example, I have updated my logger project and the released version is now 1.1.0 with a snapshot version of 1.1.1-SNAPSHOT.
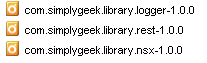
We can see the package for the latest release of logger in vRO:
However, the other projects that depend on logger are still configured for version 1.0.0. If these projects were pushed to another vRO server (such as in a release pipeline), they would release the older version of the logger artefacts (but would skip if the latest version was already deployed).
Before I continue, I want to reference this site for providing some excellent information on managing dependencies in Maven: https://www.baeldung.com/maven-dependency-latest-version
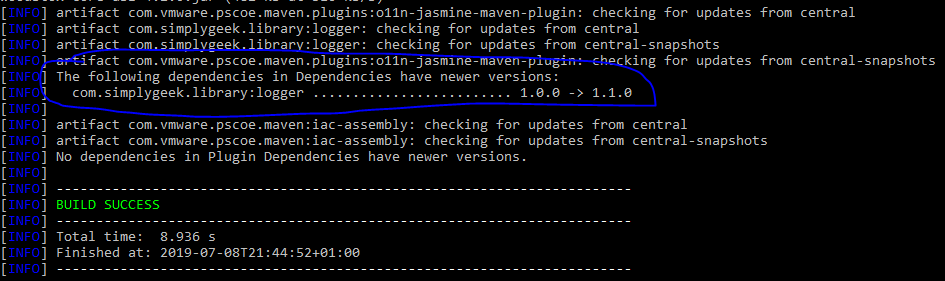
Maven provides a ‘versions’ goal that can be used to detect if any project dependencies have been updated to a later release. In this example, I am in the ‘rest‘ project, which has a dependency on ‘logger‘. The ‘pom.xml‘ is currently set to version 1.0.0 of logger, whereas logger is currently on version 1.1.0.
Issue the Maven versions goal in the project as follows:
mvn versions:display-dependency-updates
You should see that the updated dependency has been listed (sorry, my highlighting is terrible).
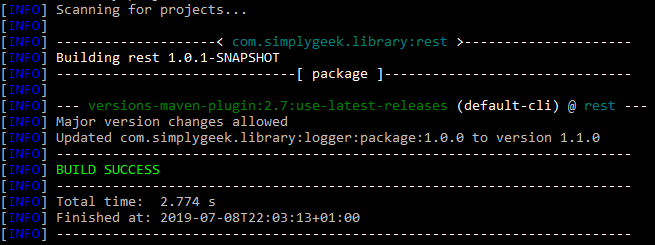
To update the project to use the latest version use the Maven versions goal as follows:
mvn versions:use-latest-releases
The output will display that the dependency versions have been updated:
You can also confirm this by looking at the ‘pom.xml‘ file.
You can now commit this change and go through the usual release process.
I hope this post has been useful. In my next post, I will discuss how to document your code and use linting tools to ensure that code is formatted to expected standards.
If you have any questions or would like some advice then simply reach out to me on the Drift app.